Before you schedule
- Connect at least one social channel in the active workspace.
- Confirm you are in the correct workspace before composing.
- Use Live preview to check text and media before you lock a time.
1. Open Create post
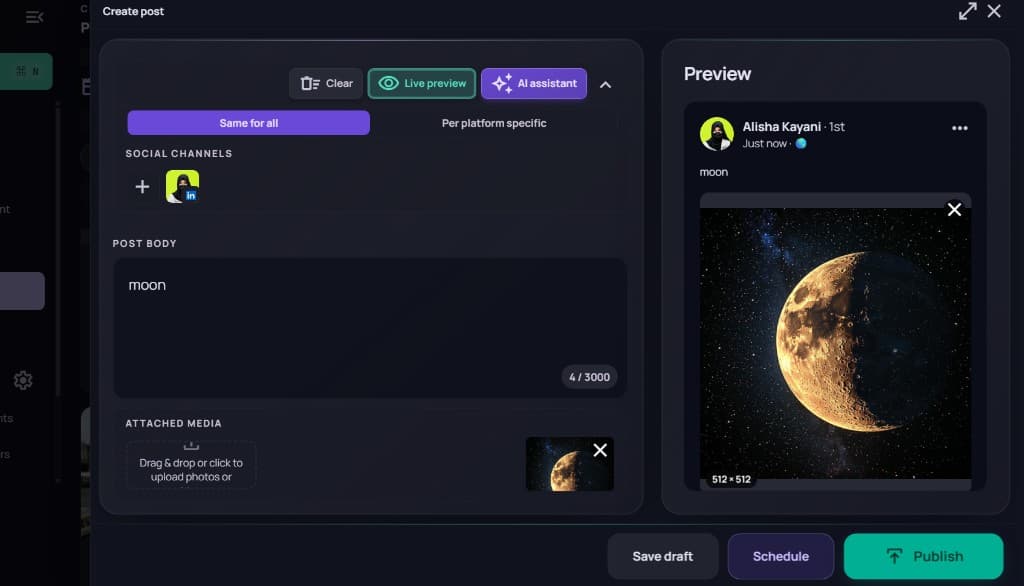
Select Create (or Schedule Post from Calendar). Choose social channels, write the post body, and attach media. Keep Same for all unless you need per-platform copy.
2. Open Pick a time
Select Schedule to open Pick a time. Use List for a day-by-day pipeline of slots, or switch to Calendar. Choose a quick slot such as + New 8:00 AM, or open Custom date & time.
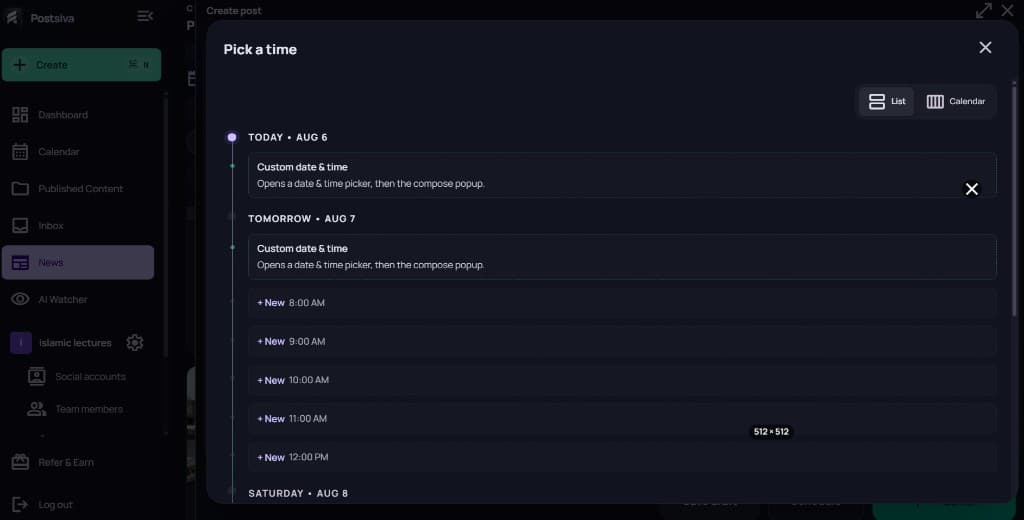
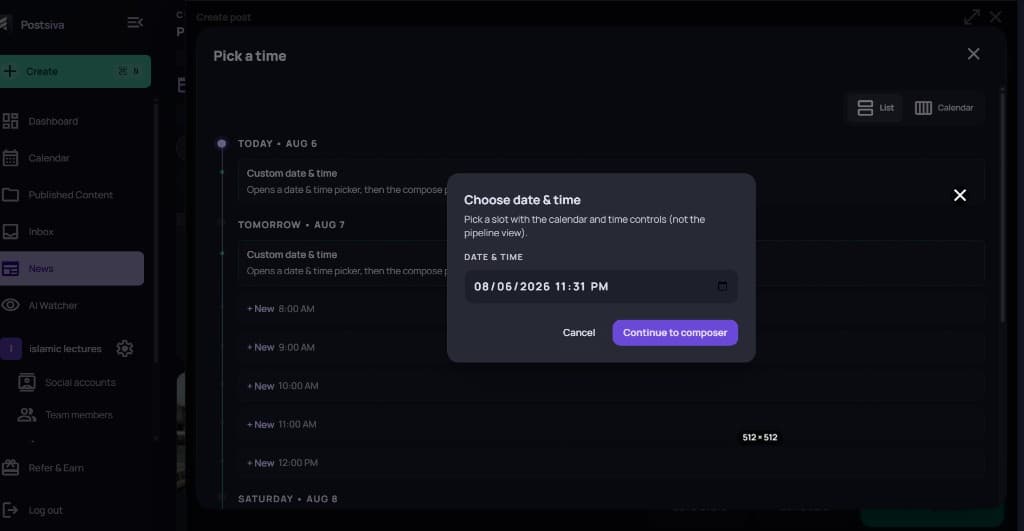
3. Choose a custom date & time (optional)
Custom date & time opens Choose date & time. Set the exact moment with the date and time controls, then select Continue to composer.
4. Confirm the schedule bar and Schedule
Back in Create post, the footer shows the selected time (for example Schedule · Aug 6 11:31 PM). Use Clear next to the time if you need to pick again, then select Schedule to queue the post.
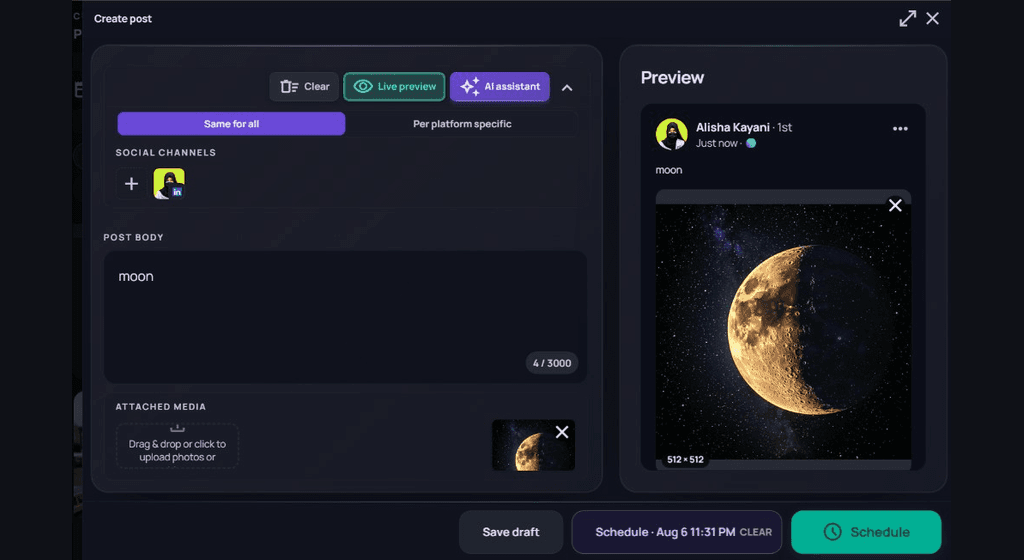
You can still Save draft without scheduling, or Publish to send immediately instead of queuing.
Good habits
- Start with one channel when validating a new workflow.
- Use previews to catch text length and media issues before they go live.
- Treat the first scheduled post as a workflow test, not a major campaign.