What a workspace is
A workspace is the operational home for one brand, client, or team. It keeps connected channels, drafts, inbox activity, calendars, and permissions scoped together.
If you manage multiple brands, create a separate workspace for each one instead of mixing everything into a single publishing surface.
1. Open the workspace selector
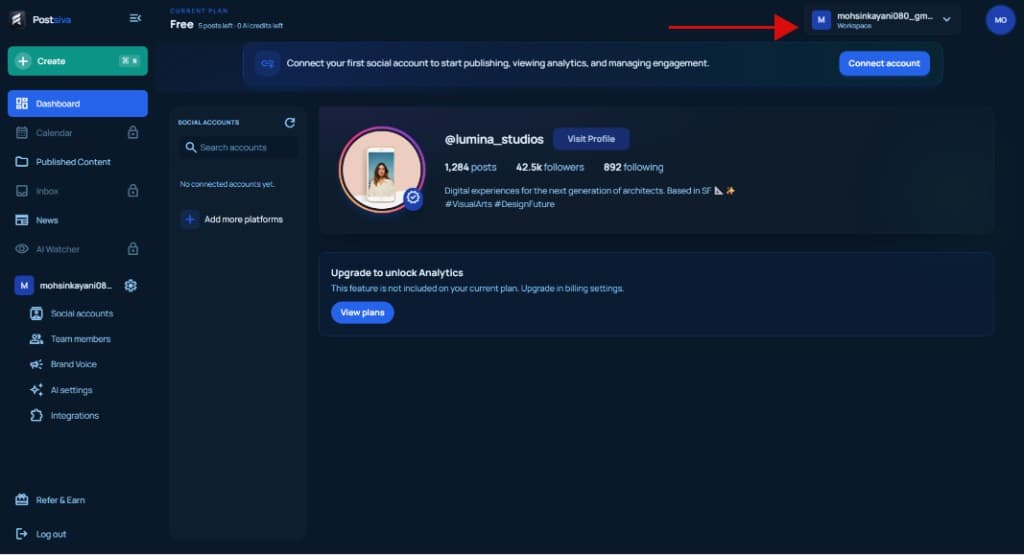
In the app header (top right), open the workspace menu next to your profile. That control shows your current workspace name.
2. Choose Create workspace
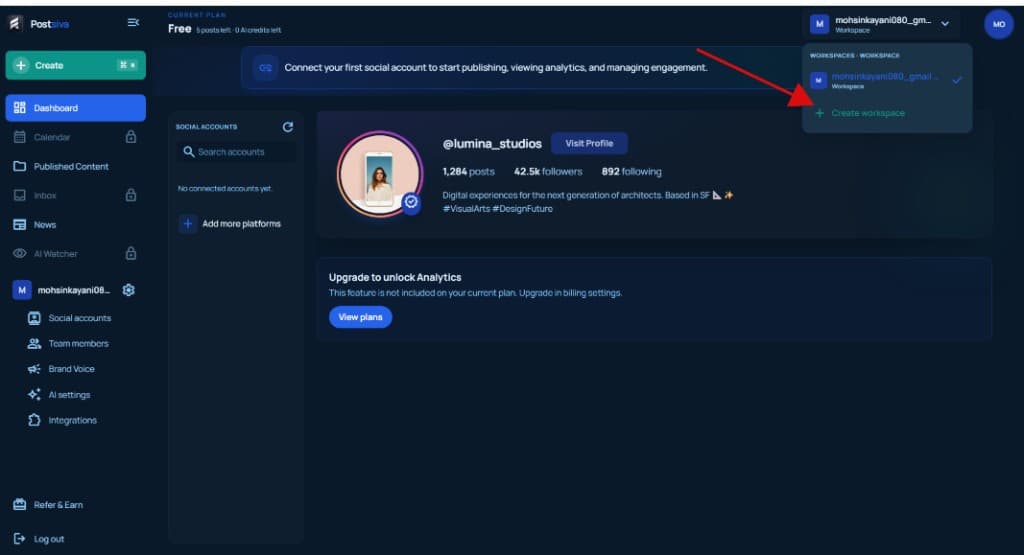
In the Workspaces menu, review your current workspace, then select + Create workspace at the bottom of the list.
3. Name and create the workspace
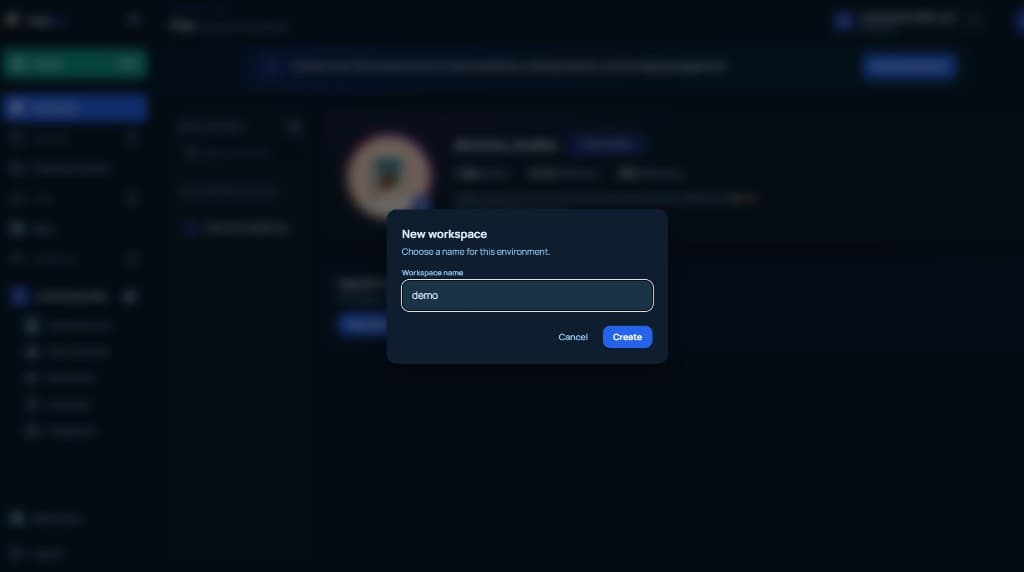
In the New workspace dialog, enter a clear name (brand or client name works best), then select Create.
- 1
Enter the workspace name
Use a name your team will recognize in the header and settings — for example the brand or client name.
- 2
Select Create
Confirm with Create. Postsiva switches you into the new workspace when it is ready.
After you create it
- Use one workspace per brand, not per person.
- Confirm the active workspace in the header before publishing.
- Connect channels gradually so permission issues are easier to isolate.
- 1
Connect one social channel first
Start with the network you publish to most often so you can test the workflow end to end quickly.
- 2
Review plan limits
Confirm channel, workspace, and collaborator limits before inviting teammates or connecting every account at once.
- 3
Publish a test post
Create a low-risk draft, preview it, and schedule it so you confirm time zone and publishing flow early.